Hiziki with Lemon!

hiziki

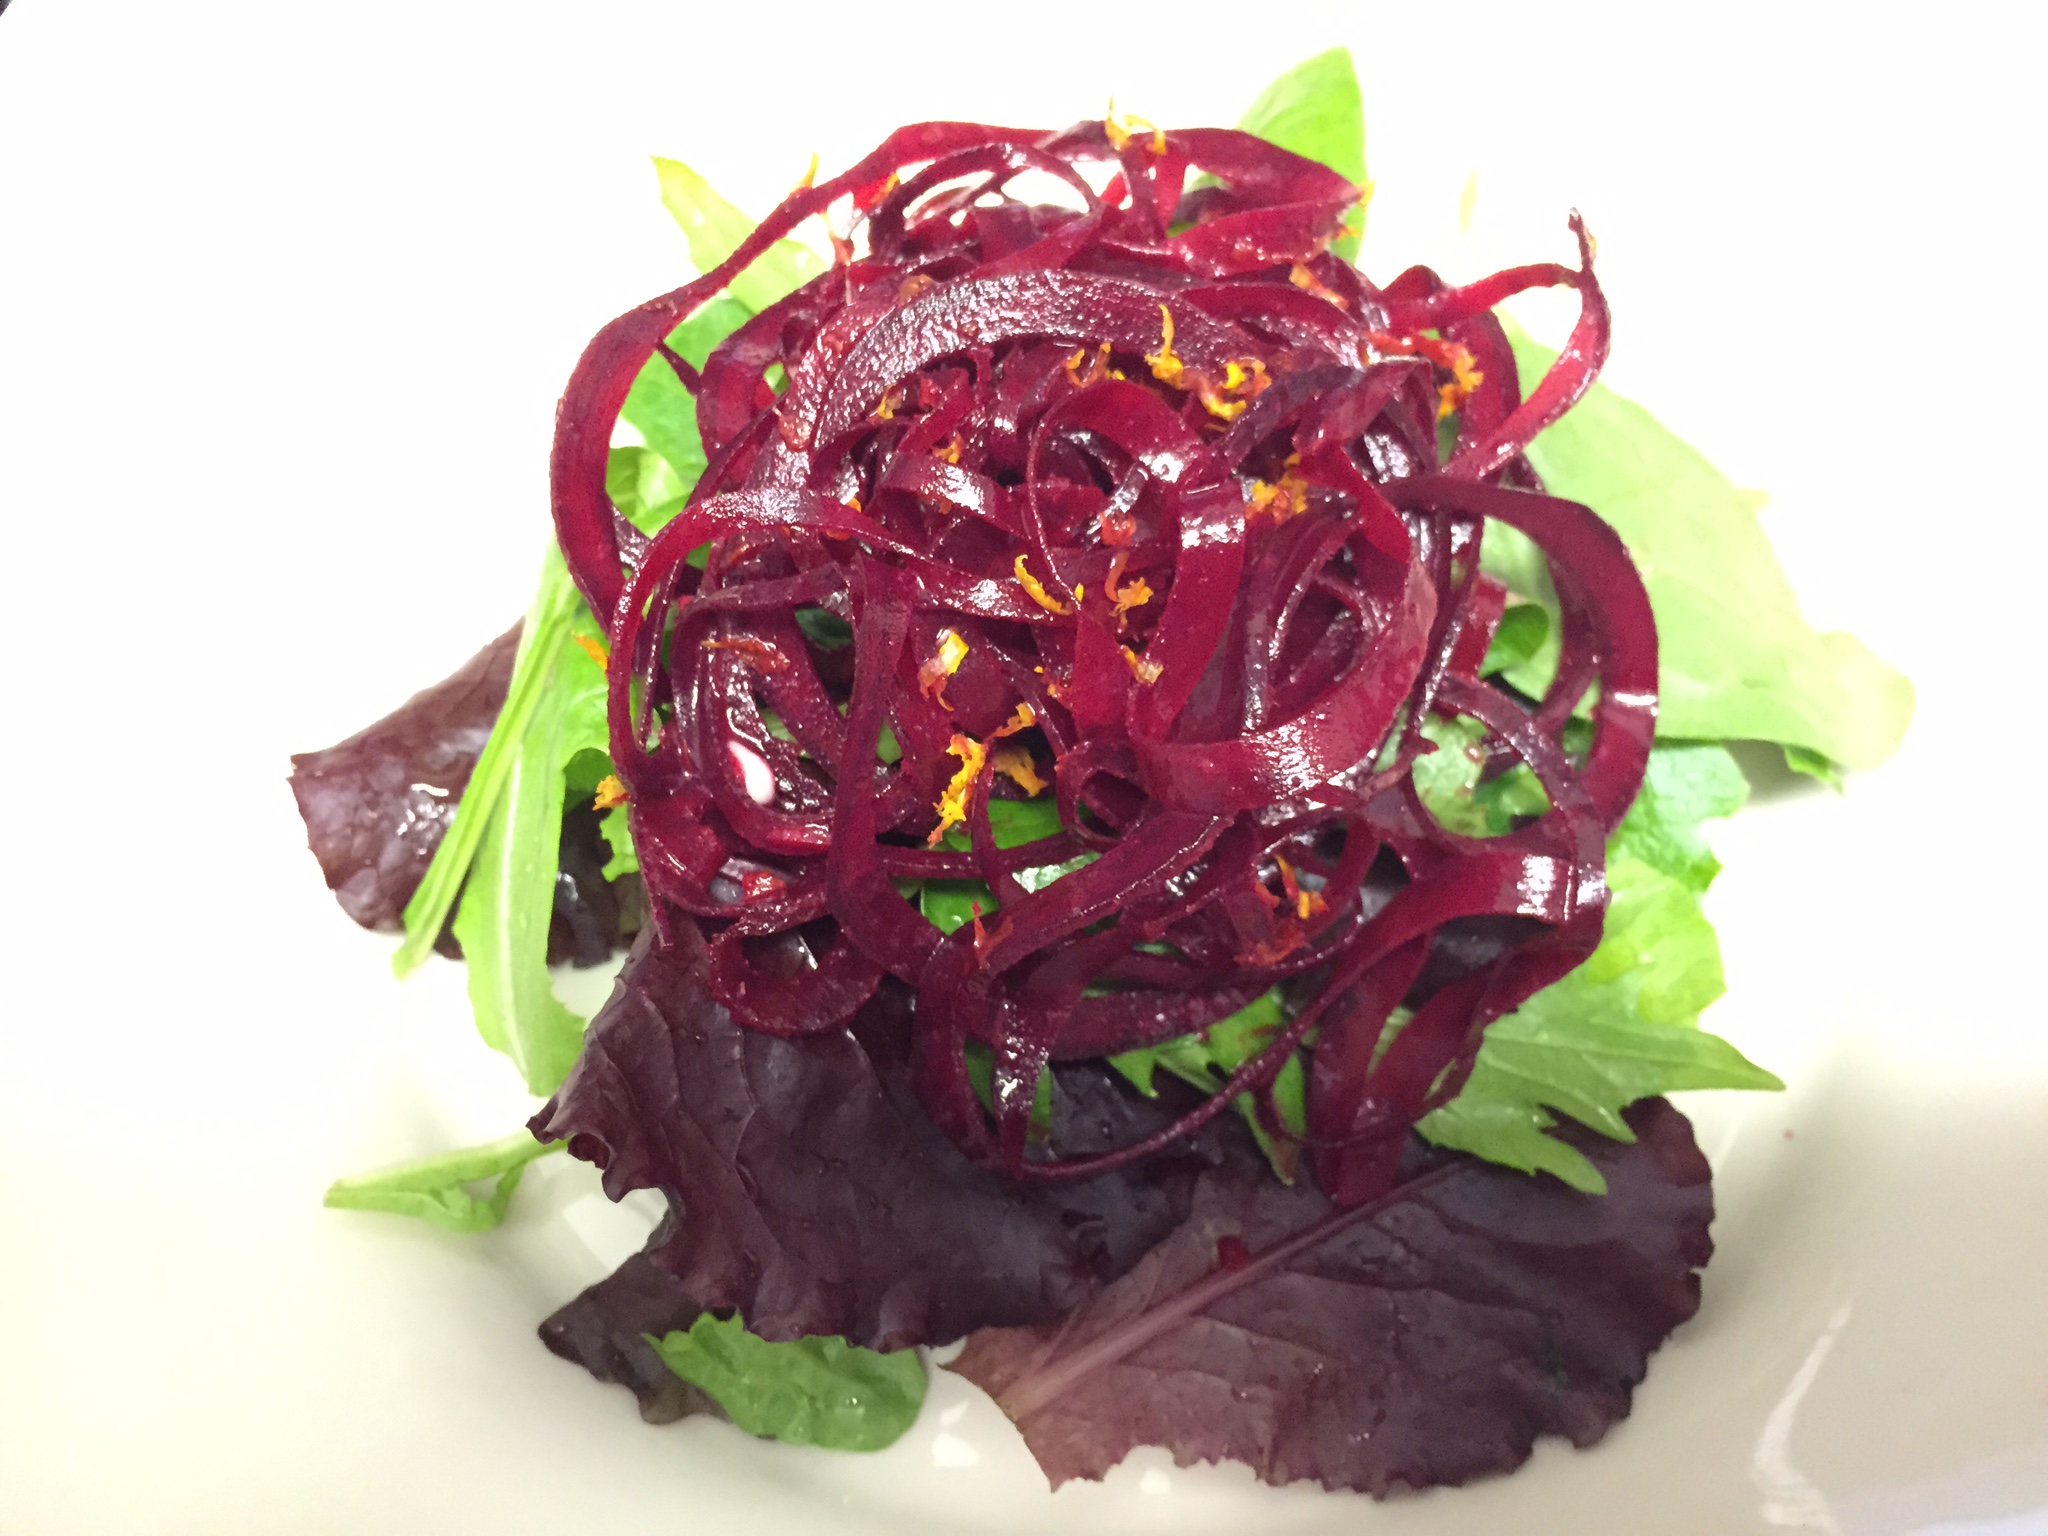
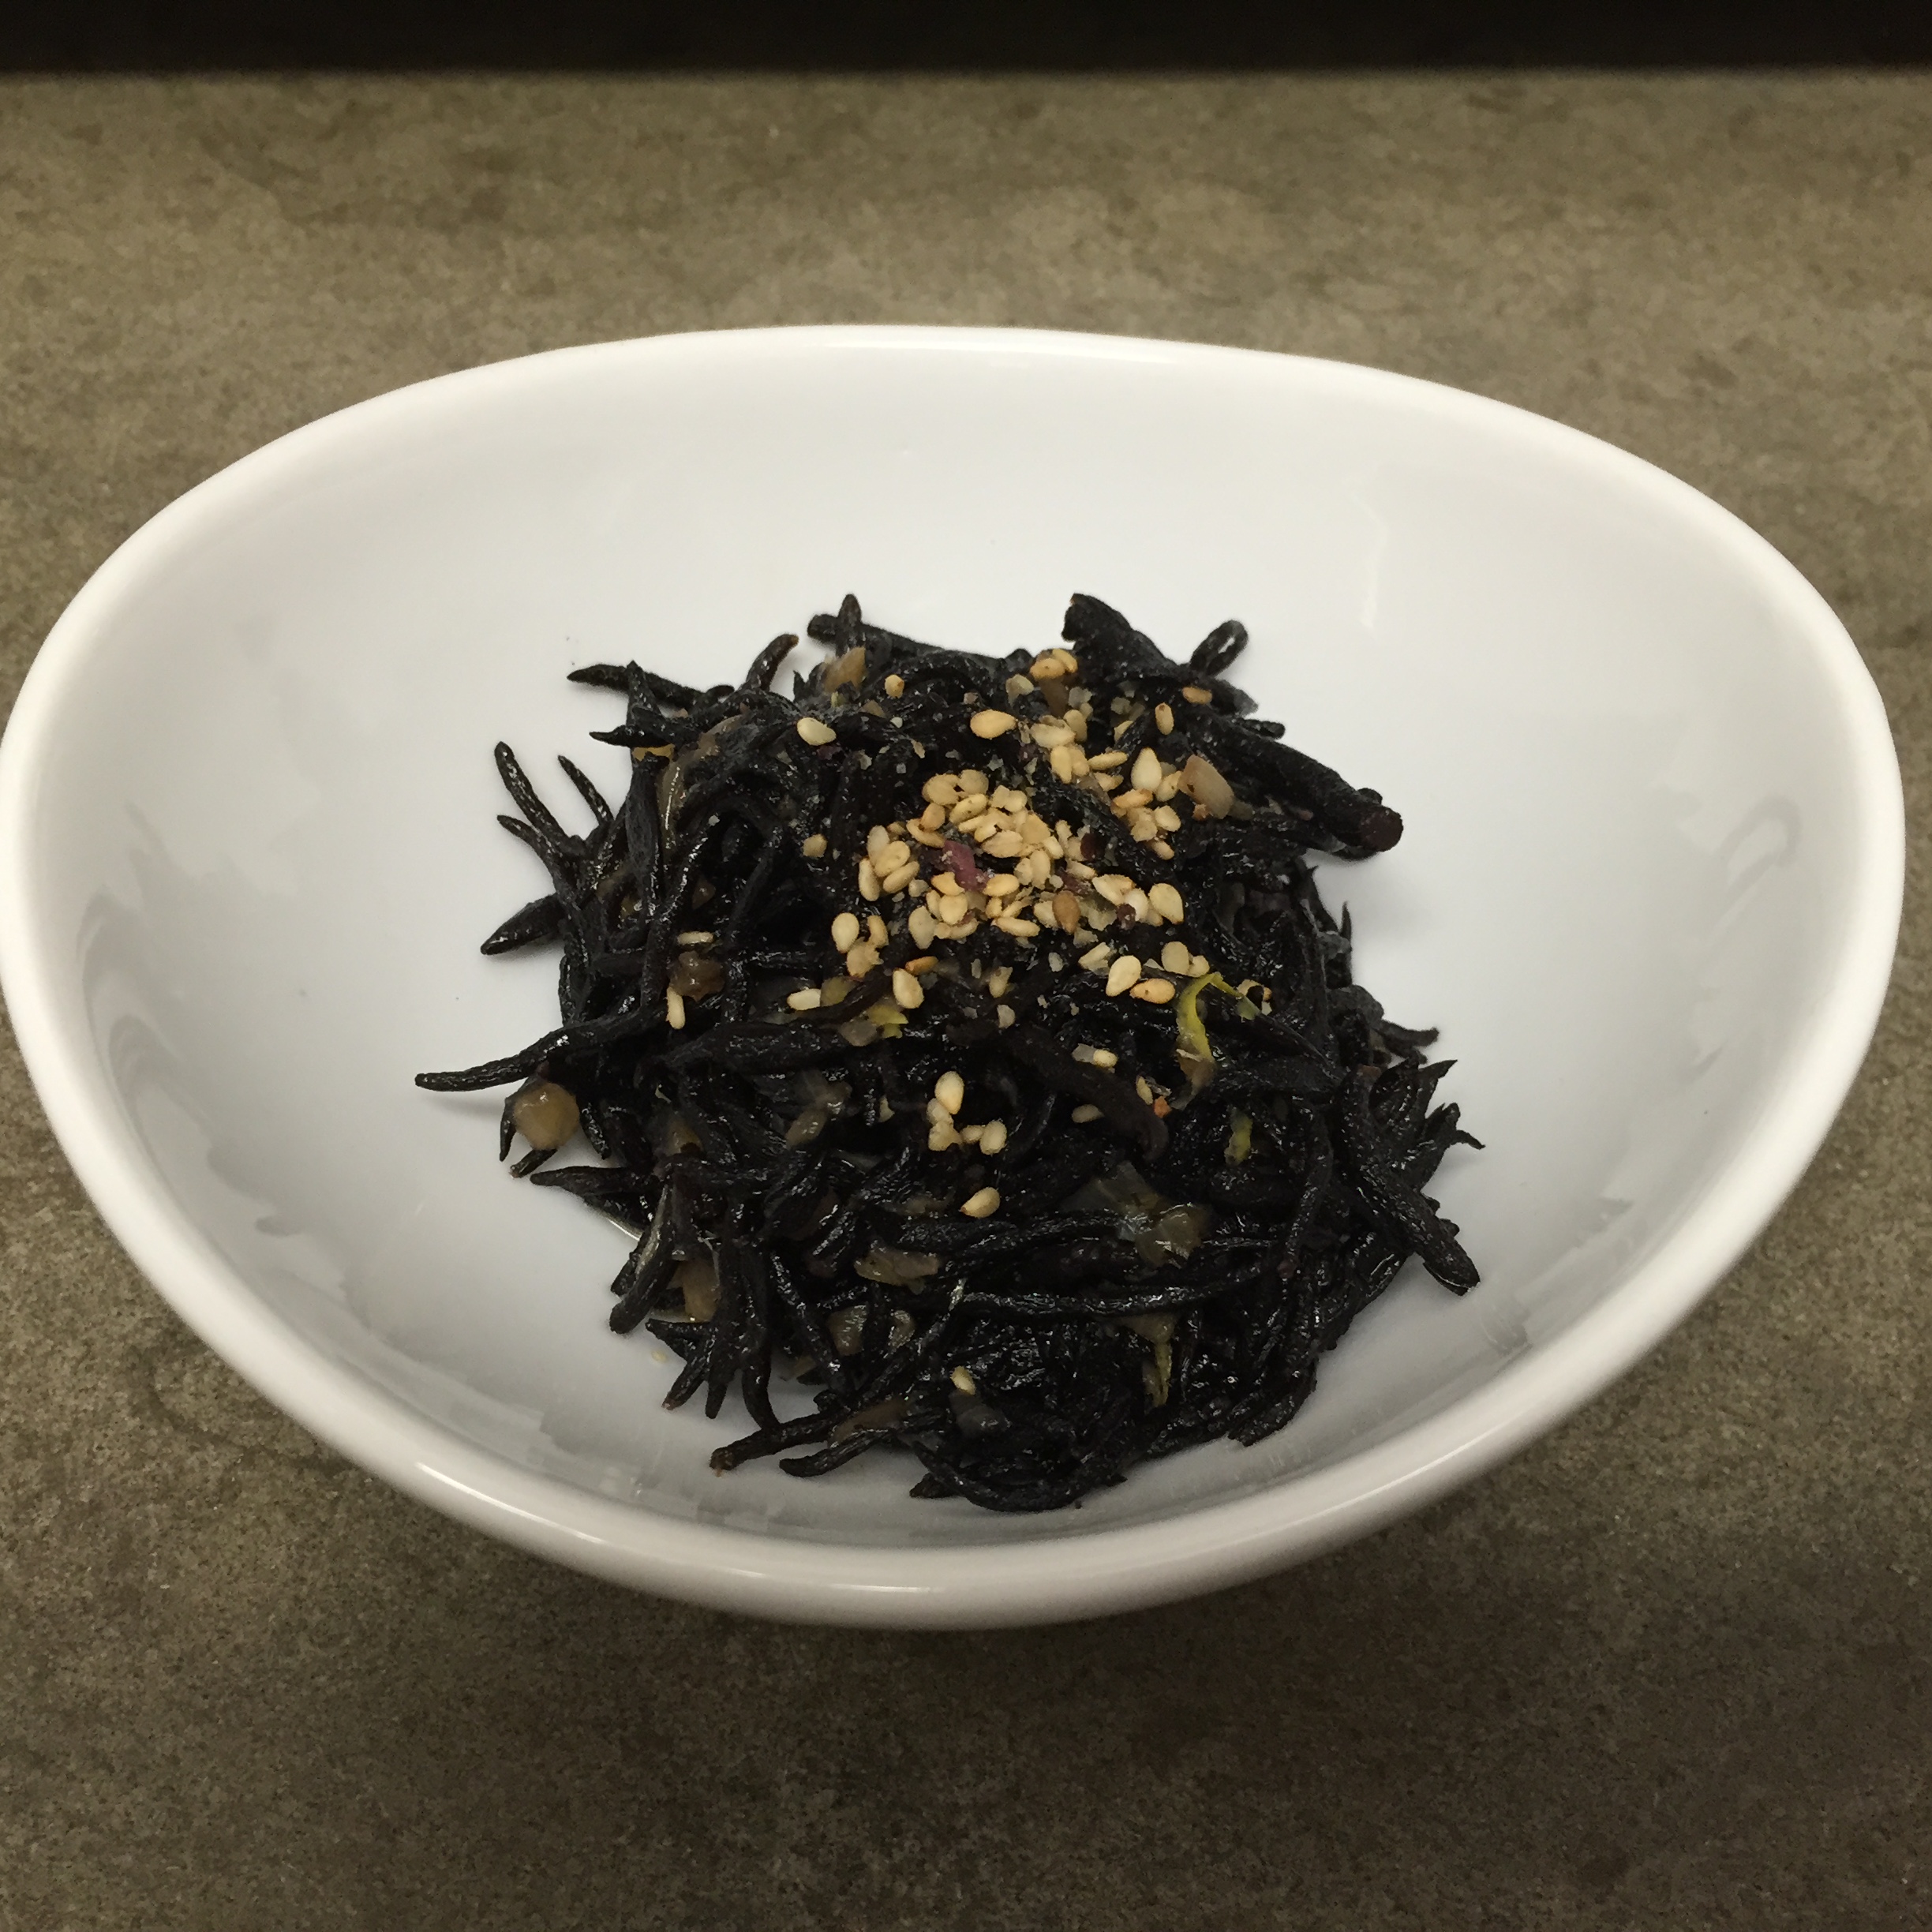
As long as I can remember, I’ve always loved seaweed in all forms. As kids, my brothers and I used to eat the dried, roasted nori strips as snacks. The green seaweed salad at Japanese restaurants was always and still is a favorite side dish. In Chinese restaurants, you can find kombu seaweed salad that is a very dark green, usually prepared with lots of garlic. My mom used to tell us that eating seaweed would make our hair darker (Japanese folklore)! In culinary school, we learned about all types of seaweed in our sea vegetables class. As it turns out, hiziki is the most nutrient dense! It became more widely available in the US during the macrobiotic movement. It’s high in fiber as well as essential minerals, including calcium, iron, and magnesium. Hope you enjoy this simple recipe!

1 cup dried hiziki (rinsed and soaked 15-20 minutes)
1 small onion, small dice
2 teaspoons sesame oil
2-3 tablespoons shoyu or soy sauce
1 lemon, zested and juiced

1. Drain off any remaining soaking water from hiziki and discard.
2. In a large saute pan, saute onion in sesame oil for 3 to 5 minutes. Add hiziki, mixing well.
3. Add enough water to just barely cover hiziki. Add shoyu or soy sauce. Bring to a boil. Cover, lower the heat, and simmer for about 30 minutes. Remove cover and cook until most liquid has evaporated.
4. Gently stir in lemon juice and zest until well mixed. Serve.

Bibimbap!

bibimbap

This is my modernized version of bibimbap, made with forbidden black rice. According to legend, this rice was only to be consumed by the emperors of ancient China and “forbidden” to the general public. Black rice has a sticky texture and slightly nutty flavor. Not only does it look beautiful, but it has the most protein of any type of rice and double the fiber of brown rice! When cooked, it turns a deep purple, indicating that it contains powerful phytochemicals that are believed to fight cancer, heart disease, and lower cholesterol. This superfood also contains more antioxidants than blueberries! Cook as you would any other type of rice.

Tonight, I also made a quick cucumber salad with an umeboshi dressing. Umeboshi paste is made from umeboshi plums that are pickled by packing them in sea salt and shiso leaves for about 6 months. In Asian medicine, they are used to treat various maladies. They are believed to relieve hangovers, stomach distress, morning sickness, and fatigue. Since they are high in sodium, they may not be ideal for anyone with high blood pressure.

Cucumber Salad with Umeboshi Dressing

Ingredients
1 tablespoon umeboshi paste
1 tablespoon mirin
8-10 mint leaves, finely chopped
1 english cucumber, thinly sliced

Directions
1. Whisk together the umeboshi paste, mirin, and mint in a large bowl.
2. Toss the sliced cucumbers with the dressing until the cucumbers are well coated.
3. Enjoy!

SuperSeed Crackers!

seed crackers

A couple of weeks ago, I was working at the coop (required for membership) and needed a snack. One of the customers purchased a box of Mary’s Gone Crackers, which looked like a healthy option. I loved them and before I knew it, I had polished off the entire box! (not unusual :P). They reminded me of these raw seed crackers that I had tried in culinary school while helping out with a dinner for another class. Therefore, I decided to try making a similar version at home, instead of buying another box. This recipe is supereasy, healthy, and yummy; hence, a great snack option 🙂 Not only are these crackers packed with omega 3s and antioxidants, they are also gluten-free, raw, and low-carb!

Ingredients:
1/3 cup chia seeds
1/3 cup flax seeds
1/3 cup sunflower seeds
1 cup coconut water
1 teaspoon za’atar
¼ teaspoon garlic powder
¼ teaspoon sea salt

Instructions:
1. *If using oven, preheat to 300 degrees. Combine all seeds and blend for about 10 seconds in the Vitamix or other powerful blender. Do not make into fine powder; leave some texture.
2. Add remaining ingredients to blender.
3. Blend again to fully incorporate ingredients. The batter should not be as thick as cookie dough but not as thin as pancake batter. It should resemble fluff, just not as sticky.
4. Using a spatula, spread onto Tefflex-Lined Dehydrator Screens or silpats about 1/8th of an inch thick. The thinner you spread it, the crispier the cracker.
5. If using oven, bake for about 30 min on each side, watching it closely. If using dehydrator, set to 155 degrees for 8 hours on each side, until crisp. If this doesn’t end up being crispy enough, you may have to put it into the oven.
6. When done to desired crispness, break apart and store in airtight container.

Asian Red Cabbage Slaw with Mint!

asian red cabbage slaw

After making the red cabbage and carrot slaw earlier in the week, I still had half a head of red cabbage and leftover mint in the fridge. I didn’t have a lot to work with and was too tired to head out to the supermarket, so this was the perfect recipe! Not until culinary school was I introduced to gomasio, which is a dry condiment made from toasted sesame seeds, sea salt, and seaweed. In Japanese cuisine, it is often sprinkled over plain rice. As part of a macrobiotic diet, it is used as the healthier alternative to ordinary salt. The slaw would be refreshing on fish tacos! The vinaigrette is very versatile and I could see it being delicious for a summer cucumber salad 🙂

½ head red cabbage, thinly sliced
¼ bunch mint, chiffonade
1 teaspoon gomasio or toasted sesame seeds (garnish)

Sesame Vinaigrette:
3 tablespoons rice vinegar
2 tablespoons soy sauce
2 tablespoons sesame oil
1 tablespoon honey

Instructions:
1. In a large bowl, whisk together vinaigrette ingredients.
2. Add cabbage and mint, making sure dressing is evenly distributed.
3. Sprinkle with gomasio or sesame seeds before serving. Enjoy!

Matcha Green Tea Latte!

matcha latte

Lately, I’ve been avoiding drinking coffee since it doesn’t seem to agree with my stomach. Although I love the taste of coffee, I’ve been moving towards tea and love this matcha latte! After paying $7 for one at Teavana, I decided to start making them at home 🙂 Matcha green tea has higher levels of antioxidants than spinach and blueberries. One cup of it has the equivalent nutritional and antioxidant value as 10 cups of regular green tea! Since the matcha powder is consumed as compared to regular tea, where the leaves are discarded following brewing, the chlorophyll is said to detox the body and balance pH levels in the blood. Similar to coffee, matcha is high in caffeine, but rather than giving a short intense burst of energy, it gives a more sustained energy. It is also believed to lower blood pressure, improve memory, and reduce stress. Enjoy a soothing cup!

Ingredients:
½ – 1 teaspoon of matcha green tea powder, depending on how strong you prefer
1/3 cup of warm-hot, but not boiling, water
1 cup warm-hot almond milk or soy milk
Optional: 1 teaspoon honey or agave

Instructions
1. Whisk green tea powder and water in a small bowl until the tea is dissolved and top slightly
foams.
2. Stir in sweetener, if using.
3. Add warm milk to the top of the drink, filling the cup.(If you have a milk frother, froth the warm milk first, then pour.) If you don’t have a frother, you could pulse in a blender.

Red Cabbage & Carrot Slaw!

red cabbage and carrot slaw

One of my friends shared this recipe with me a couple of years ago and I’ve been making it ever since! Red cabbage is such a beautiful, vibrant purple, indicating its high concentration of antioxidants. It’s not only a good source of Vitamin C, but has 10 times more Vitamin A and twice as much iron as green cabbage. For this slaw, I prefer to use the mandolin over the food processor to get it thinner, allowing it to be more tender. The carrots are easily shredded by hand with a box grater or very quickly in the food processor, which is what I did today. Toasting the pumpkin seeds really gives them a greater depth of flavor and extra crunch, which is welcoming in this slaw. I choose to just sprinkle them on top, so that they won’t get soggy. This would be perfect to bring to a bbq or spring/summer potluck. Enjoy!

1/2 red cabbage, thinly sliced
4 carrots, peeled and grated
4 sprigs fresh mint, chiffonade*
2 tablespoons pumpkin seeds, toasted

Dressing:
¼ cup extra-virgin olive oil
1 lemon, zested and juiced
1/8 teaspoon cinnamon
1/8 teaspoon ground cumin
1 teaspoon honey
½ teaspoon salt

Directions:
1. In a large bowl, whisk dressing ingredients together.
2. Add cabbage and carrots to bowl and toss, ensuring dressing is evenly distributed.
3. Add mint and gently toss again
4. Sprinkle toasted pumpkin seeds on top and extra mint, if desired, for garnish.

*chiffonade is just a fancy way of saying to cut into thin strips or ribbons. Pick the mint leaves off the sprigs, lay them on top of each other (10 at a time), roll lengthwise, and slice into thin strips.

Collard Wraps!

collard wrap

Collard wraps are a much healthier alternative to the highly-processed flour wraps bought in the store. They are a great source of calcium and vitamin K. I prefer to eat it raw because I like the crunch, but if that’s too much, you can blanch it very quickly in hot water to make it more tender. You can pretty much fill these with anything; i’ve made a breakfast burrito before with scrambled eggs, avocado, and harissa. Today, I made mine with hummus, quinoa, spiralized beets, and some micro greens 🙂 These gained popularity in California and I have yet to see them invade NYC. Juice Press, which sells fresh pressed juices and raw food, has one filled with raw sunflower seed hummus and raw falafel, which is one of my favorites. Bareburger, which offers plenty of meat and non-meat burgers, offers the option of getting your burger wrapped in cooked collard leaves. It turns out looking like a burrito, but it is nice to have the healthy option. If you’ve never had a collard wrap, I hope you’ll give it a try!

Collard greens

Fillings of your choice (ex: hummus, quinoa, veggies..)

1. Trim the bottom stem off. Then, using a paring knife, shave the dense stalk down to about the same thickness of the leaf, so that it will roll up easily. Be careful not to tear the leaf with knife.
2. Place wrap filling in the middle and roll up from bottom to top, like a burrito, folding in the sides halfway up.
3. Slice in half with a sharp knife. Enjoy!

Mustard-Roasted Cauliflower!

mustard-roasted cauliflower

The roasted cauliflower absorbs the mustardy vinaigrette, hot from the oven. It’s a warming and healthful dish, as we seem to be caught in between winter and spring these days. Cauliflower, like other cruciferous veggies, is associated with a lower risk of some cancers. It is only second to broccoli in its level of glucosinolates, which activate the body’s detoxification system. Now is the perfect time to detox through clean eating in order to be beach-ready! 🙂

1 large head of cauliflower, cut into medium-sized florets
1 red onion, small dice
2 tablespoons olive oil, divided
1 tablespoon Dijon mustard
1 teaspoon stone ground mustard
1 tablespoon red wine vinegar
Sea salt
Black pepper

1. Preheat the oven to 425° F.
2. For the vinaigrette: Whisk together the Dijon mustard, stone ground mustard, and red wine vinegar.
3. Spread the cauliflower and red onion out evenly on a large baking sheet. Toss with 1 tablespoon of olive oil and season with salt and pepper. Roast the cauliflower for 25 to 30 minutes, stirring and rotating the pan halfway, until lightly browned and tender.
4. Whisk the remaining tablespoon of olive oil into the vinaigrette and toss with the cauliflower as soon as it comes out of the oven. (It’s important to dress the cauliflower while it is still warm.) Season with additional salt and pepper, if necessary. Serve immediately.

Adapted from the Food52 recipe

Pickled Ginger!

pickled ginger

This morning, my friend and I went out for a long run, as she’s training for a marathon next month. In using ginger as an anti-inflammatory, I made some ginger tea by simmering several slices with water. I decided to pickle the leftover ginger, as I hate to let ginger shrivel away in my refrigerator. Besides, I love the bite of pickled ginger! In Ayurveda, it is also believed to stimulate circulation, aid digestion, and also enhance the absorption of nutrients. There seem to be endless benefits in consuming ginger, including treating nausea and migraines, as well as strengthening the immune system. Hope you’ll enjoy this recipe!

4-inch piece of ginger
½ cup rice vinegar
2 tablespoons sugar
1 teaspoon sea salt
1/8 teaspoon anise seed
1/8 teaspoon fennel seed
2 dried chiles de arbol
1. Peel and thinly slice a 4-inch piece of ginger (easily done on a mandolin); put in a pint size mason jar.
2. Bring rice vinegar and ½ cup of water, sugar, salt, anise seed, fennel seed, and dried chiles to a simmer in a saucepan; cook 5 minutes.
3. Pour over the ginger and let cool slightly. Cover and refrigerate overnight or up to 2 weeks.

Preserved Lemon Dressing!

preserved lemons

Preserved lemons are often used in moroccan dishes and I never thought that I would make my own. One of my friends who has really gotten into fermenting and pickling, shared the following easy recipe with me. It basically entails using lemons, lemon juice, water, and salt and allowing the lemons to ferment for close to a month. If you don’t want to wait that long, you can always purchase them in the supermarket. The fermentation process tempers the bitterness, so when included in a recipe, these lemons add an intense lemony flavor. The dressing is incredibly versatile. Today, I added a couple of tablespoons to cooked lentils. It can also be mixed into grains and wonderful with asparagus.

How To Make Preserved Lemons

This dressing is adapted from a Martha Stewart recipe:

1 preserved lemon
7 to 8 tablespoons avocado oil or extra virgin olive oil
1 teaspoon ground cumin
1 teaspoon ground coriander
¼ teaspoon freshly ground black pepper

1. Rinse whole lemon and cut in half. Remove seeds and flesh from half of the lemon and chop the skin very fine; set aside.
2. Remove seeds from remaining lemon half and add to food processor or blender with the rest of the ingredients.
3. Process/blend until well-combined. If dressing seems too thick, add water for a thinner consistency.
4. Stir in the finely chopped preserved rind.

Purple Asparagus Salad!

asparagus salad

Asparagus is a sign of spring to me, so when I saw purple asparagus at the coop, I had to have it! I love my purple veggies (carrots, cauliflower, broccoli, kale..). Asparagus is a rich source of folates, B vitamins, antioxidants, and vitamin K. This recipe is so easy and doesn’t require any cooking. The simplicity allows the star ingredient to really shine and the asparagus ribbons are beautiful.

2 tablespoons avocado oil or olive oil
2 tablespoons lemon juice
1 teaspoon dijon mustard
pinch of salt
1 bunch purple asparagus, trimmed

1. Whisk together the first 4 ingredients in a large bowl.
2. Cut off asparagus tips and halve lengthwise. Then use the peeler to shave the rest of the asparagus spear into thin strips.
3. Add asparagus to dressing and toss well, making sure each piece is lightly coated.

Minted Pea Puree!

minted pea puree

Although the weather outside doesn’t speak spring (at least in nyc), you can bring the taste of it indoors with this refreshing minted pea puree! Peas are low in fat and a half cup has as much protein as a tablespoon of peanut butter. They are also a good source of calcium and Vitamin A. This puree would be a nice base for seared sea scallops, an alternative to hummus for dipping veggies, or a spring hors d’oeuvre served on toasted baguette with toasted pine nuts.

Minted Pea Puree

1 cup frozen sweet peas
1 cup veggie stock
1 shallot, minced
6-8 fresh mint leaves
1 tsp butter or olive oil
sea salt
pepper

1. Rinse peas in a colander
2. Sweat shallot in butter or oil, until translucent (do not brown) on low heat.
3. Add peas and veggie stock, just enough to cover peas.
4. Add salt and pepper
5. Bring to a simmer and drain peas, reserving the liquid.
6. Add peas to blender with mint leaves and half of cooking liquid. Blend and add more cooking liquid for a thinner consistency.

Truffled Celery Root-Cauliflower Puree

celery root-cauliflower puree

Celery root belongs to the carrot family and has a mild celery flavor, with a rather knobby appearance. It is a good source of vitamin K and phosphorus, while cauliflower is high in vitamin C and antioxidants. Puree these together with truffle oil and the result is a silky, luxurious puree that will beat out mashed potatoes any day!

Truffled Celery Root-Cauliflower Puree

1 celery root (aka celeriac), peeled and diced
1 head of cauliflower, cut into florets
1 quart veggie broth
2 cloves of black garlic or 1 clove of roasted garlic (optional)
2 tablespoons truffle oil
sea salt

1. In a large pot, add celery root, cauliflower, and broth. Allow to steam for 15-20 minutes, until the vegetables are very tender.
2. Drain and reserve liquid. This flavorful broth can be repurposed to cook grains or as a soup base.
3. Add veggies to food processor with garlic, truffle oil, and sea salt. Puree until smooth.

Za’atar Roasted Sweet Potatoes

sweet potato with zaatar

Za’atar is a common spice mix in the mediterranean, typically a combination of toasted sesame seeds, thyme, oregano, marjoram, sumac, and salt. I’ve read that za’atar is to Lebanon what peanut butter is to America. I love to sprinkle it on top of homemade hummus or on warmed pita bread with olive oil. It also complements the sweetness of the sweet potatoes, as in this simple recipe. These sweet potatoes would make a great stand-in for home fries with some eggs! Sweet potatoes are a good source of beta carotene, Vitamin C, and potassium..and they’re delicious! 🙂

Za’atar Roasted Sweet Potatoes

2 pounds sweet potatoes (about 2 medium size), peeled and diced
olive oil
za’atar
sea salt

1. Preheat the oven to 400 degrees.
2. Spread diced sweet potatoes into a single layer on a baking sheet. Drizzle about 1-2 tablespoons of olive oil, enough to lightly coat the sweet potatoes.
3. Sprinkle liberally with za’atar and a pinch of salt, toss again.
4. Bake for about 40-45 minutes until tender and lightly browned.

Spiralized Beets!

beets

I didn’t realize that you could eat beets raw until I took the Living Foods class in culinary school. They are a good source of B vitamins and manganese and the fact that you’re eating them raw instead of cooked allows you to absorb more nutrients. If you don’t own a spiralizer, you could just shred the beets with a grater or in the food processor. These are gorgeous over mixed greens with blood orange segments!

2 medium beets, peeled and spiralized
1 garlic clove, minced
2 tablespoons rice wine vinegar
2 teaspoons dijon mustard
1 tablespoon avocado oil or extra virgin olive oil
zest of small orange
salt to taste

1. In a large glass bowl, whisk together the garlic, vinegar, mustard, and oil.
2. Add the spiralized beets and massage the dressing into the beets to evenly distribute.
3. Add orange zest (save some to garnish) and mix well.

Chia Pudding!

chia pudding

When the book Born to Run was released in 2009, chia seeds burst onto the scene as a superfood. The book highlights the Tarahumara Indians in Mexico that are naturally superfit ultrarunners with a diet high in chia. Chia seeds are full of calcium, antioxidants, protein, fiber, and are the most concentrated sources of omega 3 fatty acids. Chia seeds are able to absorb up to 12 times their own weight! And when soaked in liquid, they turn into a gelatin. This is perfect for breakfast or a healthy snack and is quite filling. The sweetness comes from bananas, rather than sugar or any sweeteners, so you can really feel good about eating this and sharing with family.

Makes 2-3 servings

2-3 ripe bananas
1 cup almond milk or coconut water
¼ cup chia seeds
½ teaspoon vanilla extract
1/8 teaspoon cinnamon

1. Blend bananas in Vitamix or other powerful blender.
2. In a large bowl, whisk the pureed bananas with almond milk or coconut water until thoroughly combined.
3. Add the chia seeds while whisking in order to prevent clumps.
4. Add vanilla extract and cinnamon and mix well.
5. Cover bowl with plastic wrap and refrigerate for at least 8 hours to set.
6. Enjoy!

Quinoa with Carrot-Top Pesto!

pesto quinoa

In the interest of using whole vegetables, I’ve been exploring using the greens of different veggies, including carrots, radishes, and beets. Rather than wasting these nutrition-packed leaves, you could simply saute them with olive oil and garlic for a nice side dish. Carrot tops are a great source of vitamin C, potassium, and calcium. Today, I opted to make pesto with them and some beautiful basil from the coop. Pesto is incredibly versatile and can be added to just about anything  for a flavor boost like quinoa, pasta, rice, potatoes, eggs, pizza.

Ingredients:
1 bunch carrot tops, de-stemmed
1 ounce basil (clamshell), de-stemmed
1 clove black garlic or regular garlic
2 tablespoons pine nuts
¼ cup extra virgin olive oil
pinch sea salt

2 cups cooked quinoa

Procedure:
1. Combine carrot tops, basil, salt, garlic, pine nuts, and oil in food processor or blender.
2. Process and stop to scrape down the sides of the container.
3. Add more oil for a thinner consistency.
4. Mix 2 tablespoons of pesto into the cooked quinoa.

Black Garlic Hummus!

blackgarlic hummus

This was my first time using black garlic, which I purchased at my co-op. However, I’ve definitely seen it at Trader Joe’s, but I’m not sure if it’s a regular item there. I’m pretty sure you could find this in Whole Foods in the produce area. Through a month-long fermentation process, regular garlic turns into supergarlic! While regular garlic is touted for being high in antioxidants, black garlic has been shown to contain double the antioxidant properties of regular garlic. Not only is it more nutritious, but it is richer and sweeter, with a melt-in-your-mouth consistency. The flavor really enhances this hummus and would work really well in other dips, spreads, and sauces.

2 15 oz cans of chickpeas or 3 cups of cooked chickpeas
½ head of black garlic, peeled
1 teaspoon lemon juice
½ teaspoon salt
Olive oil

1. Drain the beans and place into a food processor with the black garlic, salt, and lemon juice.
2. Pulse several times to combine, scraping down the sides as you go.
3. While the food processor is on, drizzle in olive oil to desired consistency.

Soba Noodles with Peanut Sauce!

soba noodles

This is one of my favorite dishes to make when carbo-loading for a marathon! While there are plenty of carbs in this dish, edamame adds a lean, healthy protein that is also a good source of folate, manganese, and Vitamin K. The fresh grated ginger wakes up the palate and will serve to boost your immune system. This dish comes together very quickly, as the ingredients for the sauce are simply whisked together, and the noodles are done in 5 minutes. It makes for an easy weeknight dinner and leftovers are perfect for lunch the next day 🙂

Soba Noodles with Peanut Sauce

Makes about 4 servings

2 tablespoons reduced sodium tamari or soy sauce
2 teaspoons toasted sesame oil
2 tablespoons unsweetened peanut butter
2 tablespoons rice vinegar
1 teaspoon grated fresh ginger
1 garlic clove, minced
10 ounces soba noodles
5 scallions, thinly sliced
2 cups shelled edamame
1/4 cup gomasio or toasted sesame seeds
2 persian cucumbers, julienned

1. In a large, shallow bowl, whisk the tamari, sesame oil, peanut butter, vinegar, 2 tablespoons water, ginger, and garlic.
2. In a pot, boil 3 quarts of water. Add noodles and stir. cook until tender (5 minutes).
3. Drain in a colander; run cold water over the noodles until the water runs clear. (If the noodles aren’t washed, they’ll be starchy and sticky.) Drain thoroughly again.
4. Add noodles to the sauce and toss to coat evenly. Add edamame scallions (reserving some to garnish); toss again.
5. Garnish with scallion, cucumber, and gomasio.

Mejadra!

Mejadra

Last night, I was stuck working at the restaurant, as it’s one of the busiest nights of the year. But there was a silver lining in that I made this deliciously comforting recipe 🙂 It’s packed with warming spices and the lentils and rice form a complete protein together. I must admit that I couldn’t help filling up my tasting spoon a few times to make sure it was good 😛 I was so taken by the recipe, that I made it this morning in my apartment! This is true healthy, comfort food..hope you enjoy!

1 cup coconut oil
8 shallots, thinly sliced
1 ¼ cups cooked green or brown lentils
2 tsp cumin seeds
1½ tbsp coriander seeds
1 cup basmati rice
2 tbsp olive oil
½ tsp ground turmeric
1½ tsp ground allspice
1½ tsp ground cinnamon
1 tsp sugar
Salt and black pepper
1 ¾ cups water

1. Heat the coconut oil in a medium-size heavy-based saucepan. When very hot, carefully add the shallots in batches. Fry, until the onion takes on a nice, golden-brown color and turns crispy. Transfer to sheet tray, lined with paper towels and sprinkle with salt.
2. Wipe clean the saucepan in which you fried the shallots and drop in the cumin and coriander seeds. Place over a medium heat and toast the seeds for a minute or two. Add the rice, olive oil, turmeric, allspice, cinnamon, sugar, half a teaspoon of salt and plenty of black pepper. Stir to coat the rice with oil, then add the cooked lentils and water. Bring to a boil, cover and simmer on very low heat until rice is cooked through, about 30 minutes.
3. Stir in half of the shallots and garnish with the remaining. Enjoy!

Note: This is adapted from Chef Yotam Ottolenghi’s mejadra recipe. He’s a genius!